Re-wrapping Batteries: A Comprehensive Guide
Re-wrapping Batteries
Every vaper knows this: after some time, the protective foil of the batteries gets damaged. This is especially annoying if the battery is relatively new. However, you don't have to dispose of the battery; you have the option to re-wrap it with a new protective foil, known as wraps. What may sound difficult at first is actually quite simple if you pay attention to certain things. Here we try to explain how it all works and what you need to pay attention to. Whether re-wrapping makes sense is something everyone must decide for themselves. This depends, among other things, on whether only the foil is damaged or the battery as well. If it's really just the foil and the battery is not much older than six months, it could well be worth it. The time effort is relatively small, and the costs are manageable.
Where can I get suitable foils/wraps for my batteries, and what do I need to pay attention to when buying?
Normally, you can get the foils from your trusted dealer, whether offline or online, it doesn’t matter. What's important for you is just to know which format your batteries are. For the common battery sizes 18650 and 21700, they are usually available. There are various designs from different manufacturers. Whether plain, single-color, or in cartoon optics, you have the free choice. The prices vary depending on the manufacturer and the design of the replacement foils.
How does the whole thing work?
Basically, it is quite simple. It involves a plastic foil that shrinks when heated. Of course, you should not overdo it with the temperatures, as the foil could shrink too much or the battery could be damaged. In the worst case, the battery could outgas. Guided by the motto "Less is more," you should approach it cautiously. Ideally, you have a heat gun at hand that you can use. A regular hair dryer will also do, of course, but it might take a bit longer depending on the model. Gas burners or lighters are not suitable, although there are people who re-wrap their batteries with such devices, but you have to be extremely careful. We do not recommend this variant.
Step by Step
Note:
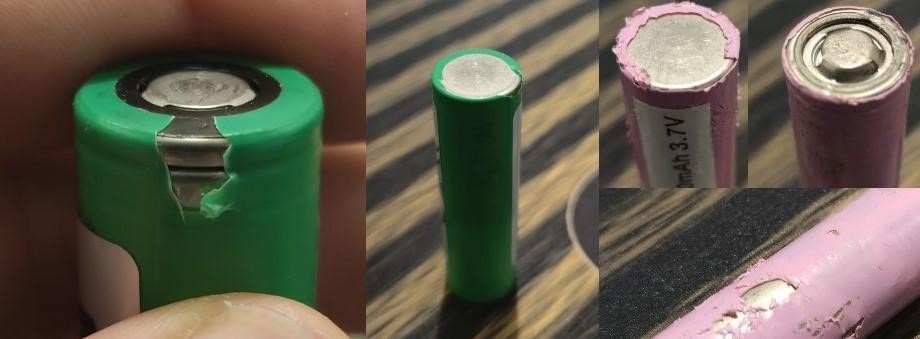
If your battery looks like the one in the picture (above), you should under no circumstances continue to use it. This can lead to short circuits.
Preparation
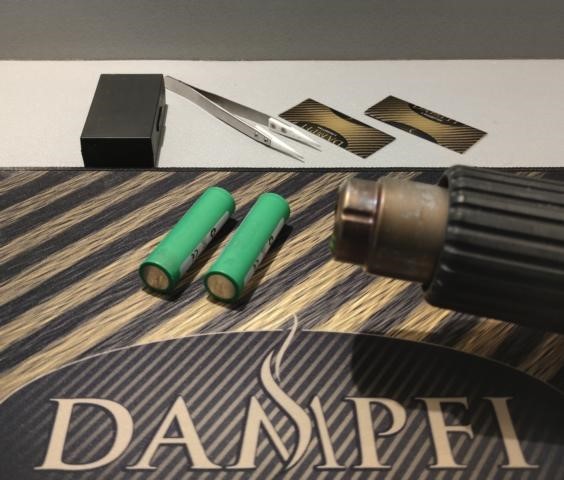
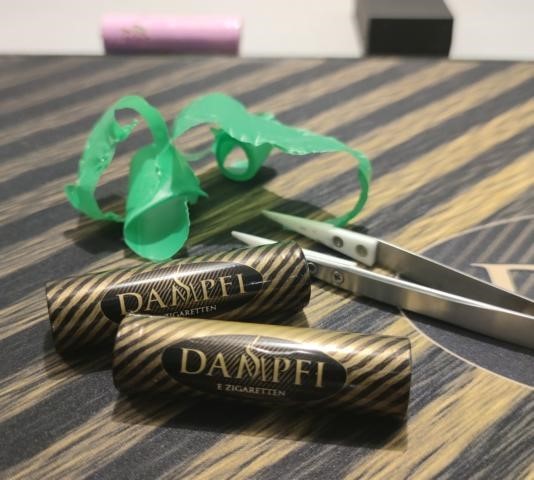
Once you have laid out the batteries, the wraps, and the required tools, we recommend clearing away all unnecessary metallic objects. A clean workplace helps prevent accidents and achieve the desired result. If you are wrapping for the first time, it is helpful to have a few wraps in reserve. You might be "lucky" (or skilled) and succeed right away, but initial failures are part of the process and are not the end of the world. So, it doesn't hurt to have a few extra wraps on hand. Rome wasn't built in a day, so just go for it.
Step 1:
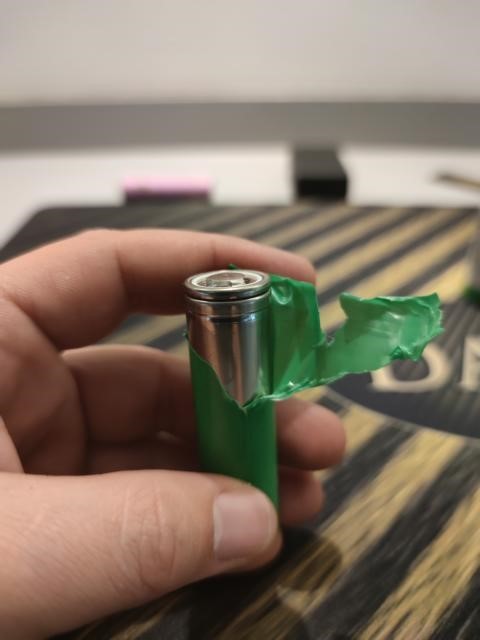

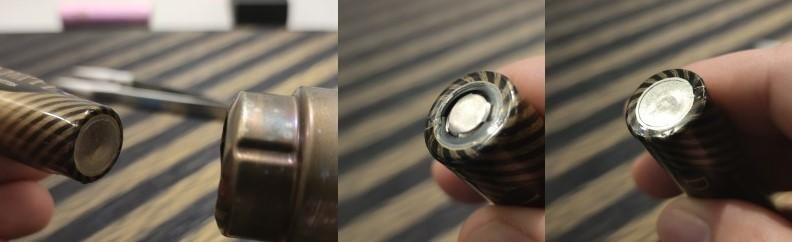
Carefully remove the foil without damaging the battery. Ideally, you should use ceramic tweezers. The small ring (red arrow) must not be damaged under any circumstances; it is an important insulator that you will need later (unless you have a replacement).
Step 2:
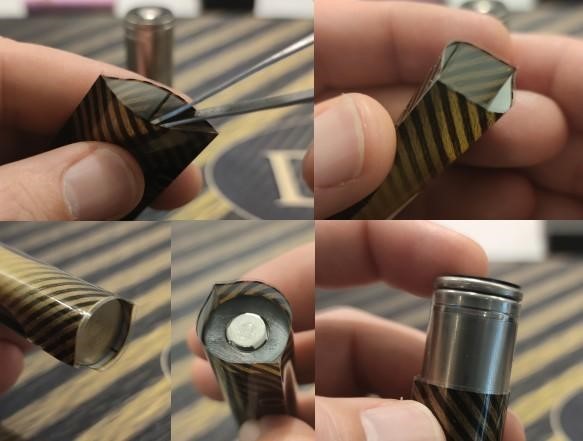
Now you can carefully slip the new wrap over your "naked" battery. The battery should ideally be positioned centrally (top/bottom). Then place the insulator on the positive terminal.
Step 3:
The hair dryer or heat gun should not be set too high. We recommend "testing" the device on a low setting, then you will quickly notice whether the power is sufficient or needs to be increased. To prevent the insulator on the positive terminal from flying away, we recommend starting there. Once the insulator is fixed by the wrap, you can attend to the rest of the battery. Please ensure not to overheat the battery in one spot. If the foil gets too much heat, it will shrink more than you would like and get damaged. Carefully and evenly blow-dry the battery all around until you are satisfied with the result.
Ergebnis:
With a little effort and a small budget, your batteries should ideally look like new afterwards and can be used again without any concerns.